Sharing Files & Setting Permissions
Learn how to share files and folders with colleagues, set the right access levels, and manage who can see your content in OneDrive.
In this guide
1 Share a file or folder
You can share any file or folder stored in OneDrive directly from your browser or File Explorer.
From the OneDrive web app (browser)
- Go to onedrive.com and sign in with your work account.
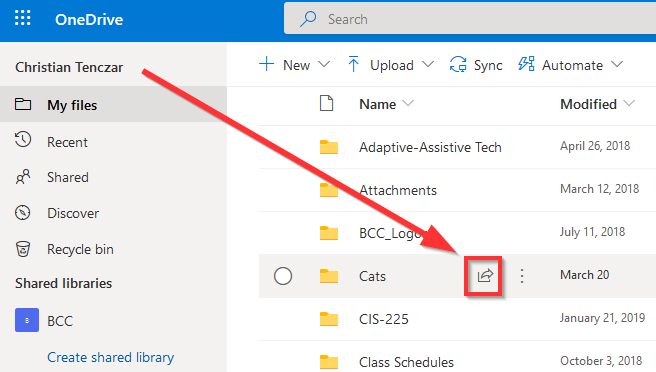
- Find the file or folder you want to share. Hover over it and tick the checkbox that appears.
- Click Share in the top toolbar, or right-click and choose Share.
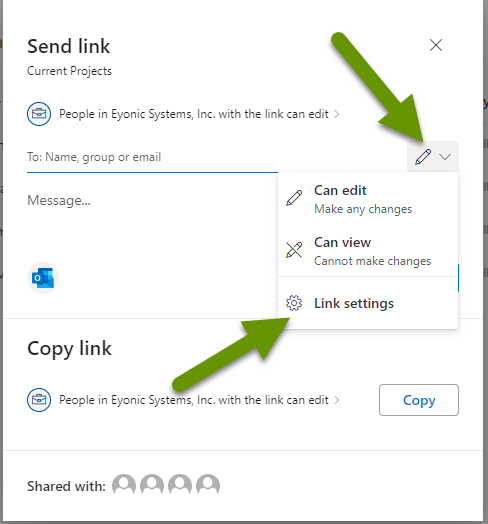
- A sharing dialog will appear — see Section 2 to choose the right link type.
- Type the name or email address of the person you want to share with.
- Select their permission level (View or Edit) from the dropdown next to their name.
- Optionally, type a message in the message box.
- Click Send. The recipient will receive an email with a link to the file.
From File Explorer (Windows)
- Open File Explorer and navigate to your OneDrive folder.
- Right-click the file or folder you want to share.
- Select Share from the context menu.
- The same sharing dialog will appear. Follow steps 4–8 above.
2 Understanding link types
When you click Share, you will see a link settings area at the top of the dialog. Choosing the right link type is important for security.
| Link type | Who can access it | When to use it |
|---|---|---|
| Anyone with the link | Anyone — including people outside the company — who receives the link | Sharing public resources or with external partners (use with caution) |
| People in [Your Organisation] | Any employee with the link who is signed in to their work account | Internal sharing where you don't need to restrict to specific individuals |
| Specific people | Only the named individuals you add | Confidential documents, HR files, or anything sensitive |
3 Permission levels explained
Once you choose who can access the file, you need to set what they can do with it.
| Permission | What the recipient can do |
|---|---|
| Can view | Open and read the file. Cannot make changes or download (depending on settings). |
| Can edit | Open, read, and make changes to the file. Changes are saved automatically. |
| Can review (Word only) | Add comments and tracked changes, but cannot accept or reject changes. |
4 Set an expiry date or password
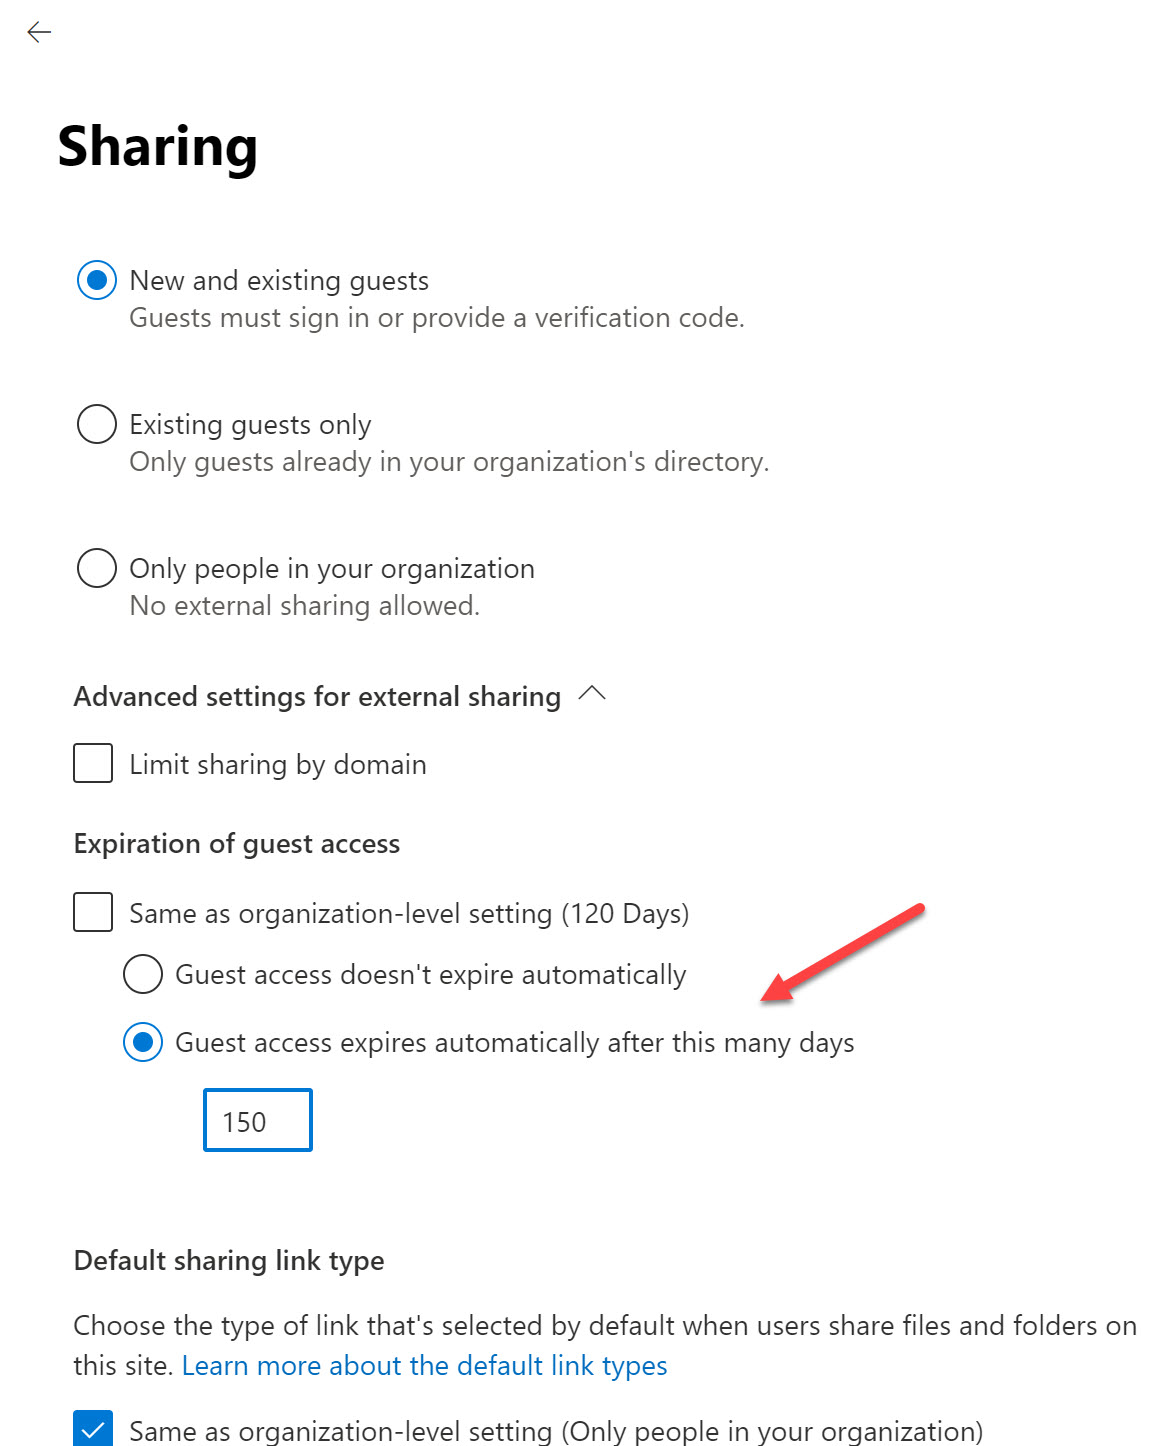
For added security — especially when sharing outside the organisation — you can set a link expiry date or require a password.
- In the sharing dialog, click the link type at the top (e.g., Anyone with the link).
- A settings panel will expand. You will see options for Expiration date and Password.
- To set an expiry: click the Set expiration date field and pick a date from the calendar.
- To add a password: toggle on Set password and type a password. Share this password separately with the recipient (not in the same email as the link).
- Click Apply to save the settings, then continue to send the link.
5 View and manage existing access
You can see everyone who currently has access to a file and change their permissions at any time.
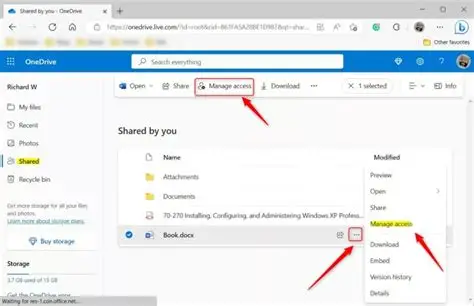
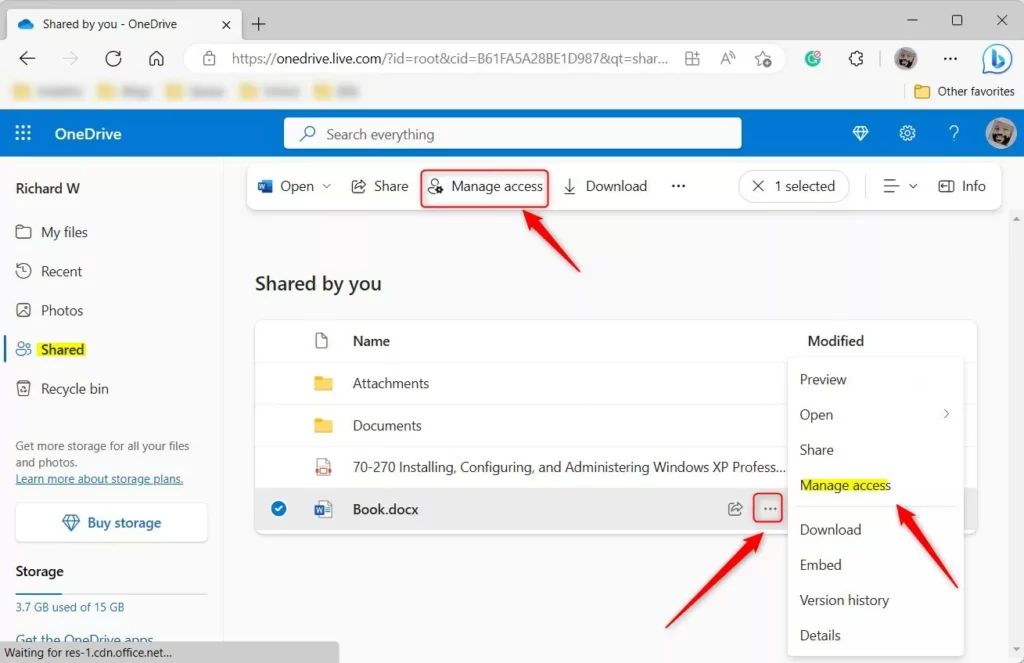
- In OneDrive, right-click the file or folder and choose Manage access.
- A panel will open on the right showing all people and links that have access.
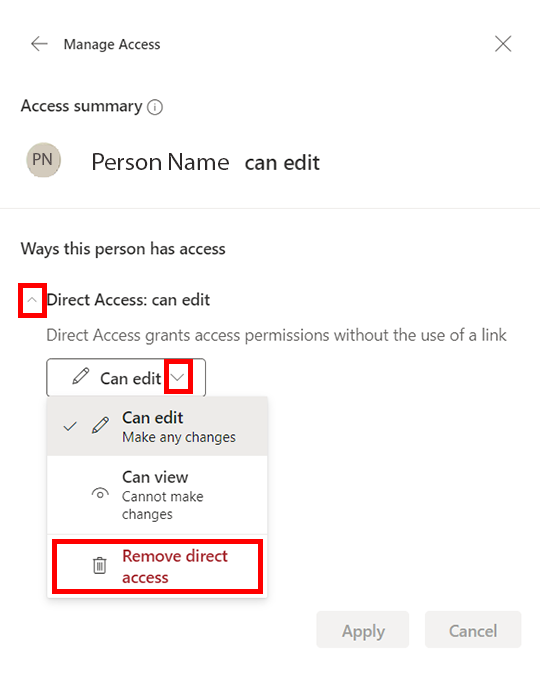
- To change someone's permission: click the dropdown next to their name and select a new level, or choose Stop sharing to remove them.
- To edit a link: click the three-dot menu (⋮) next to the link and choose to copy, edit, or disable it.
6 Stop sharing a file
You can remove access for everyone or just specific individuals at any time.
Remove a specific person
- Right-click the file and select Manage access.
- Find the person's name in the list.
- Click the dropdown next to their name and select Stop sharing.
- Their access is removed immediately.
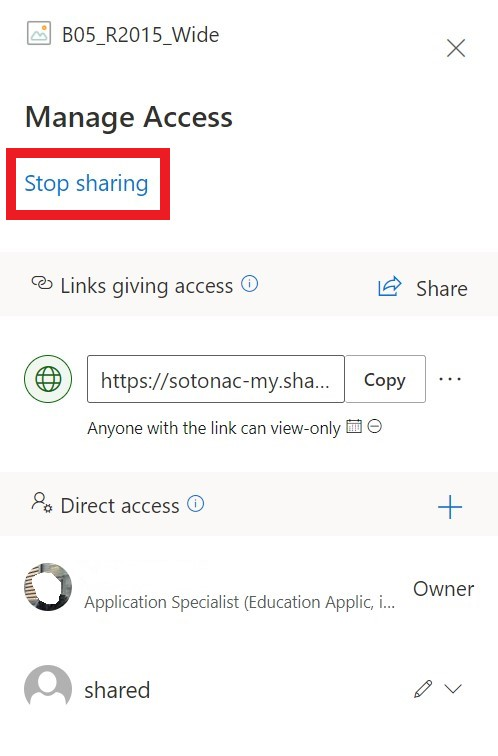
Remove all access (disable all sharing links)
- Right-click the file and select Manage access.
- At the top of the panel, click Stop sharing.
- A confirmation dialog will appear. Click Stop sharing to confirm.
- All links and individual permissions are removed immediately.
⚡ Quick reference — sharing at a glance
| Task | Where to find it |
|---|---|
| Share a file | Right-click file → Share |
| Change someone's permissions | Right-click file → Manage access → click their permission dropdown |
| Set link expiry or password | Share dialog → click link type → expand settings |
| See who has access | Right-click file → Manage access |
| Remove a person's access | Manage access → dropdown next to name → Stop sharing |
| Disable all sharing | Manage access → Stop sharing (top of panel) |
Was this article helpful?
That’s Great!
Thank you for your feedback
Sorry! We couldn't be helpful
Thank you for your feedback
Feedback sent
We appreciate your effort and will try to fix the article